Hey there!
I wanted to pop on here for a bit and show you my latest DIY completed project that has been added to my living room and that’s these wicked end tables!
When I made these, I didn’t expect to blog about it so I don’t have many pictures to do a tutorial. But I was inspired to make these because of my coffee table. I love old and rustic things. I think I would be in heaven if I had a barn, even though my allergies would kill me. Since moving to Pennsylvania, I’m in awe with everything here because of the history that’s here and how much of the old is integrated with the new. Being from the south, you do see old plantations but they’re usually completely deserted or pretty far off the beaten path. So seeing old buildings that were built 100 years ago all over the place and old farms that are just so charming just makes my heart sing. That’s when I discovered flea markets like I never have seen them before.
I’ve been infatuated with old crates for a long time. Aside for on TV, I never knew where I could get one. So I went to this fantastic flea market in Middletown. I found this one section that had everything that I could possibly want, including stuff that I didn’t know I wanted. But since I was a girl on a mission, I found these crates that were just perfect! Talked to the shop owner on a deal (I’ve grown to love haggling) and viola, they were mine for $11 each!
I knew they were going to be end tables. But it took me a while to think of the best way I was going to accomplish it and wasn’t going to cost me so much money. During this time I met this lovely lady, whom I purchased a beverage cart from through Craigslist (another future DIY project) and she and I found common ground with our love of DIY repurposing. She told me that Lowe’s has table legs that you could purchase that was decently priced. HOW DID I NOT KNOW THIS?!?! I went and I searched and could not find any table legs.
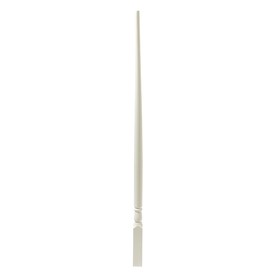
I swear I now know Lowe’s like the back of my hand. I know they are now on aisle 24 but I swear I went all over that store and didn’t see them anywhere. So I had to make a decision. I don’t have all the tools that I would need to make my own table legs. If I bought all the tools, I could have easily purchased 6 tables. I looked online to gauge where else I could purchase table legs and how much they were and they were not cheap! We’re talking about at least $8 a leg and I needed 8 of them! So I went back to Lowe’s and I decided to purchase 8 – 34 inch Colonial Balusters or stair spindles like these:
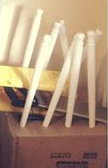
They were under $4 each. I cropped off the “top” or the square sections. Measured them from the top where the ball of the design started to the bottom to 20.5 inches and sawed off 5 inches from the bottom. I used a box to hold the rods while I spray painted them. I chose Rust-Oleum Claret Wine Gloss spray paint. I sprayed one side and let it dry. Then flipped the rods over and spayed the bottom side.
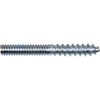
On the underside of the crate box, I installed 4 table leg angle top plates to hold in the legs. After the legs dried, I drilled a hole at the top and screwed in a 5/16 in x 2 in hanger bolt (pointy side in the table leg).
Then screwed the table leg into the plate that I installed at the bottom of the crate. I did have to go back and touch up on the paint on the legs, especially where the leg ended with the box. There was a slight ring on the leg that I just sanded down and used a paint brush to finish it off. At the bottom of the legs I tacked on silver looking furniture glides. With all the parts and hardware, it cost me about $35 per table to make and I love them! They look amazing in my living room, next to the sofa. They are very sturdy and perfect for my coffee mug! I’m one happy gal. And my wife is happy that I didn’t spend a butt load of money. Win win!


