Hey guys!
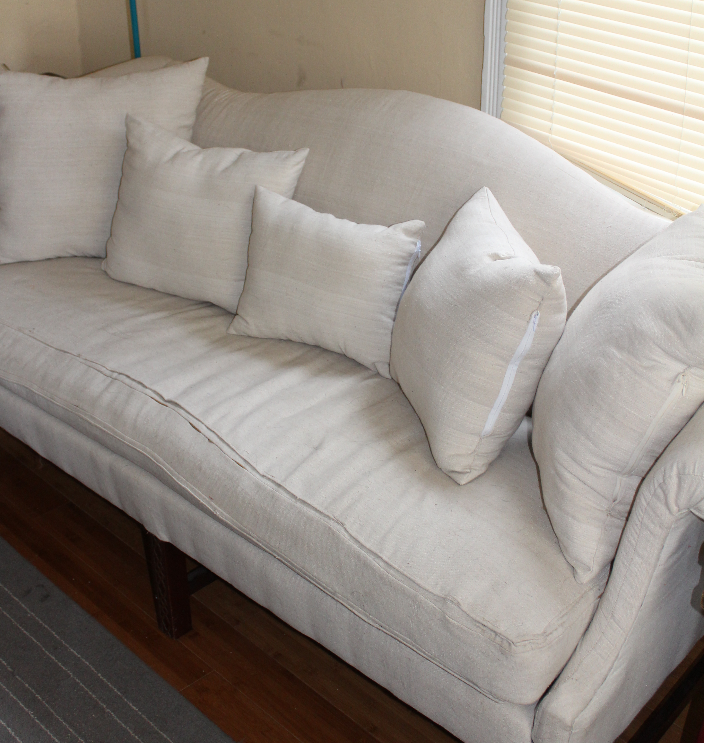
So last week we made our own pillows. Since I had just finished reupholstering my sofa, I could not wait to add some color to that bad boy! I might have went overboard with pillows but I don’t care. So I now have five pillows. I did the 20 inch pillows for last week’s blog but I decided to also do 2 16 inch pillows and one 12 x 16 inch rectangle pillow.
This week, as promised, we are making pillow covers! YAY!
Materials needed to make a basic pillow cover:
- Fabric – depending on your pillow size will differ how much fabric you will need. If you are doing the 20 inch pillows, then 3 yards will be needed for 2 pillows. The 16 inch pillows, I only needed a yard for both. And the rectangle pillow, I used scrap fabric from a previous project and wanted to tie the two furniture pieces together for my living room. But I would guess, maybe ½ yard of fabric if you are making one.
- Pins
- Sewing machine/needle and thread
- Scissors
Here we go!
The process of making the pillow covers is very similar to making the pillows. But we are more or less making a pillow sleeve so you can easily remove the cover if need to wash or change. For my own purpose. I used 3 different looks for my pillows. But to start, you want to measure out your fabric for each cover.
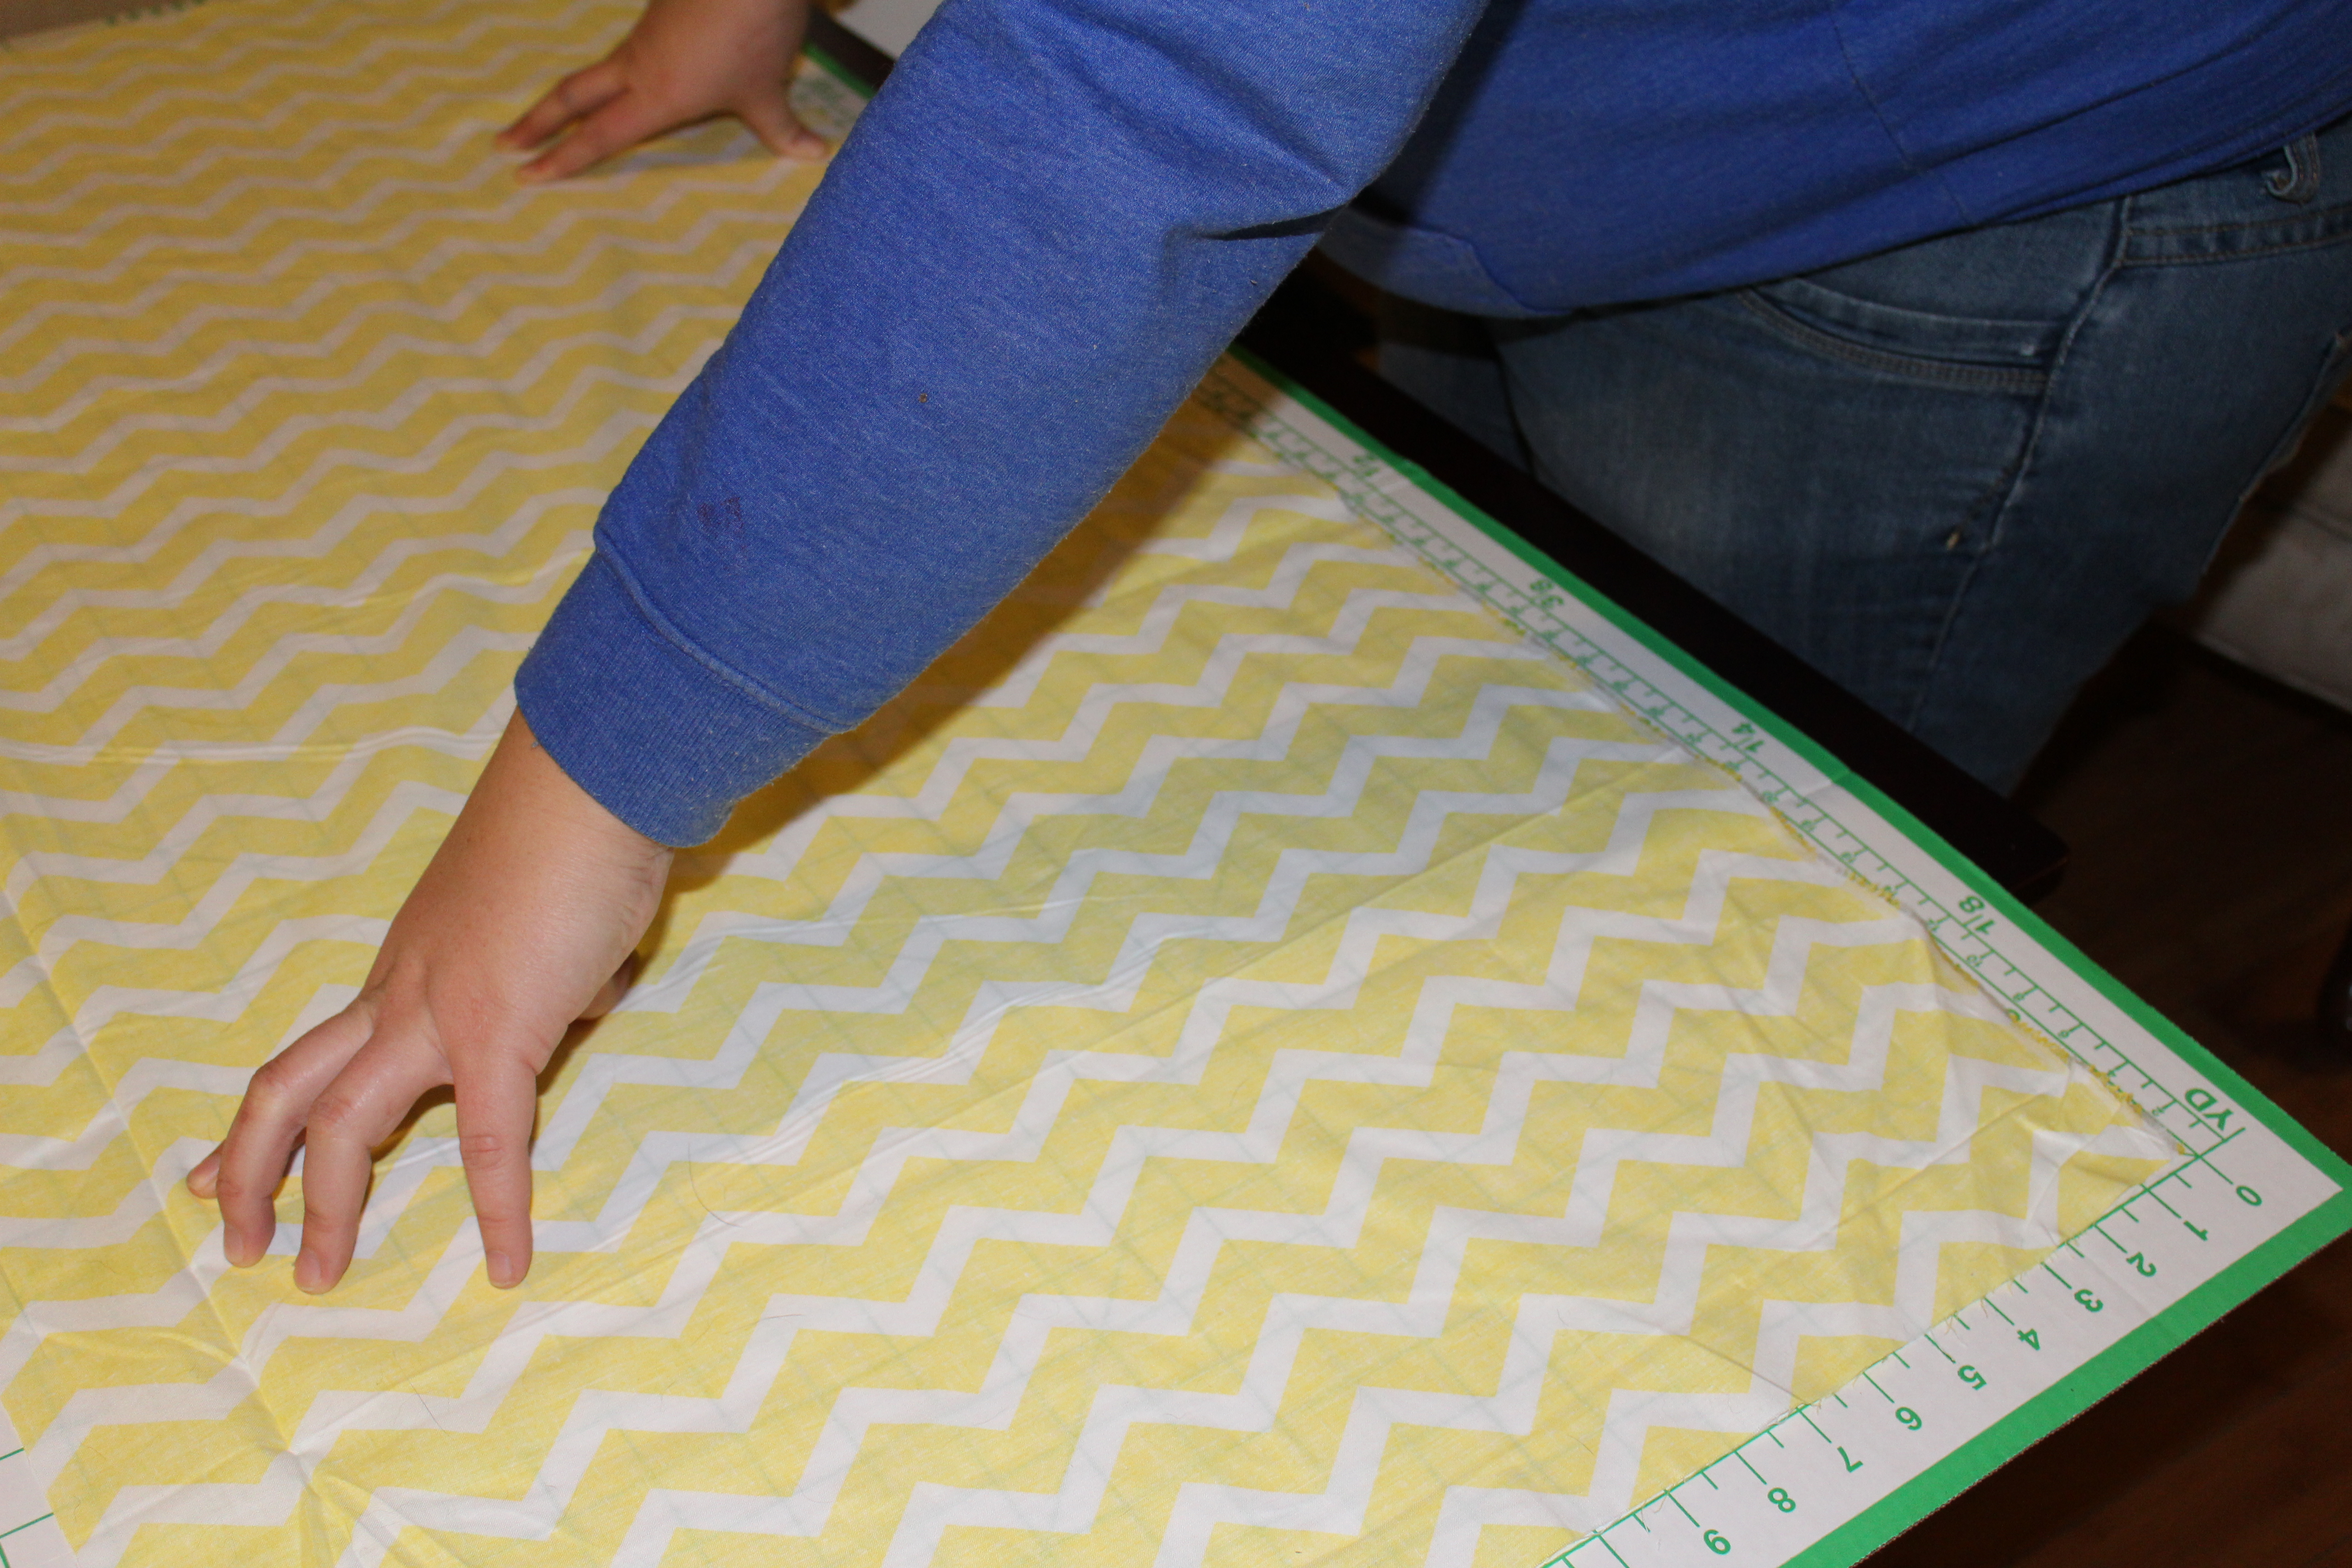
My measurements were as follow:
20 inch – Measure yellow chevron fabric 23 x 42 inches per pillow.
16 inch – Measure beige fabric 18 x 36 inches per pillow.
I wrapped the pillows and cut accordingly but either way that will make things easier for you.
Once you have your fabric cut, you want to hem the top and bottom of the fabric.
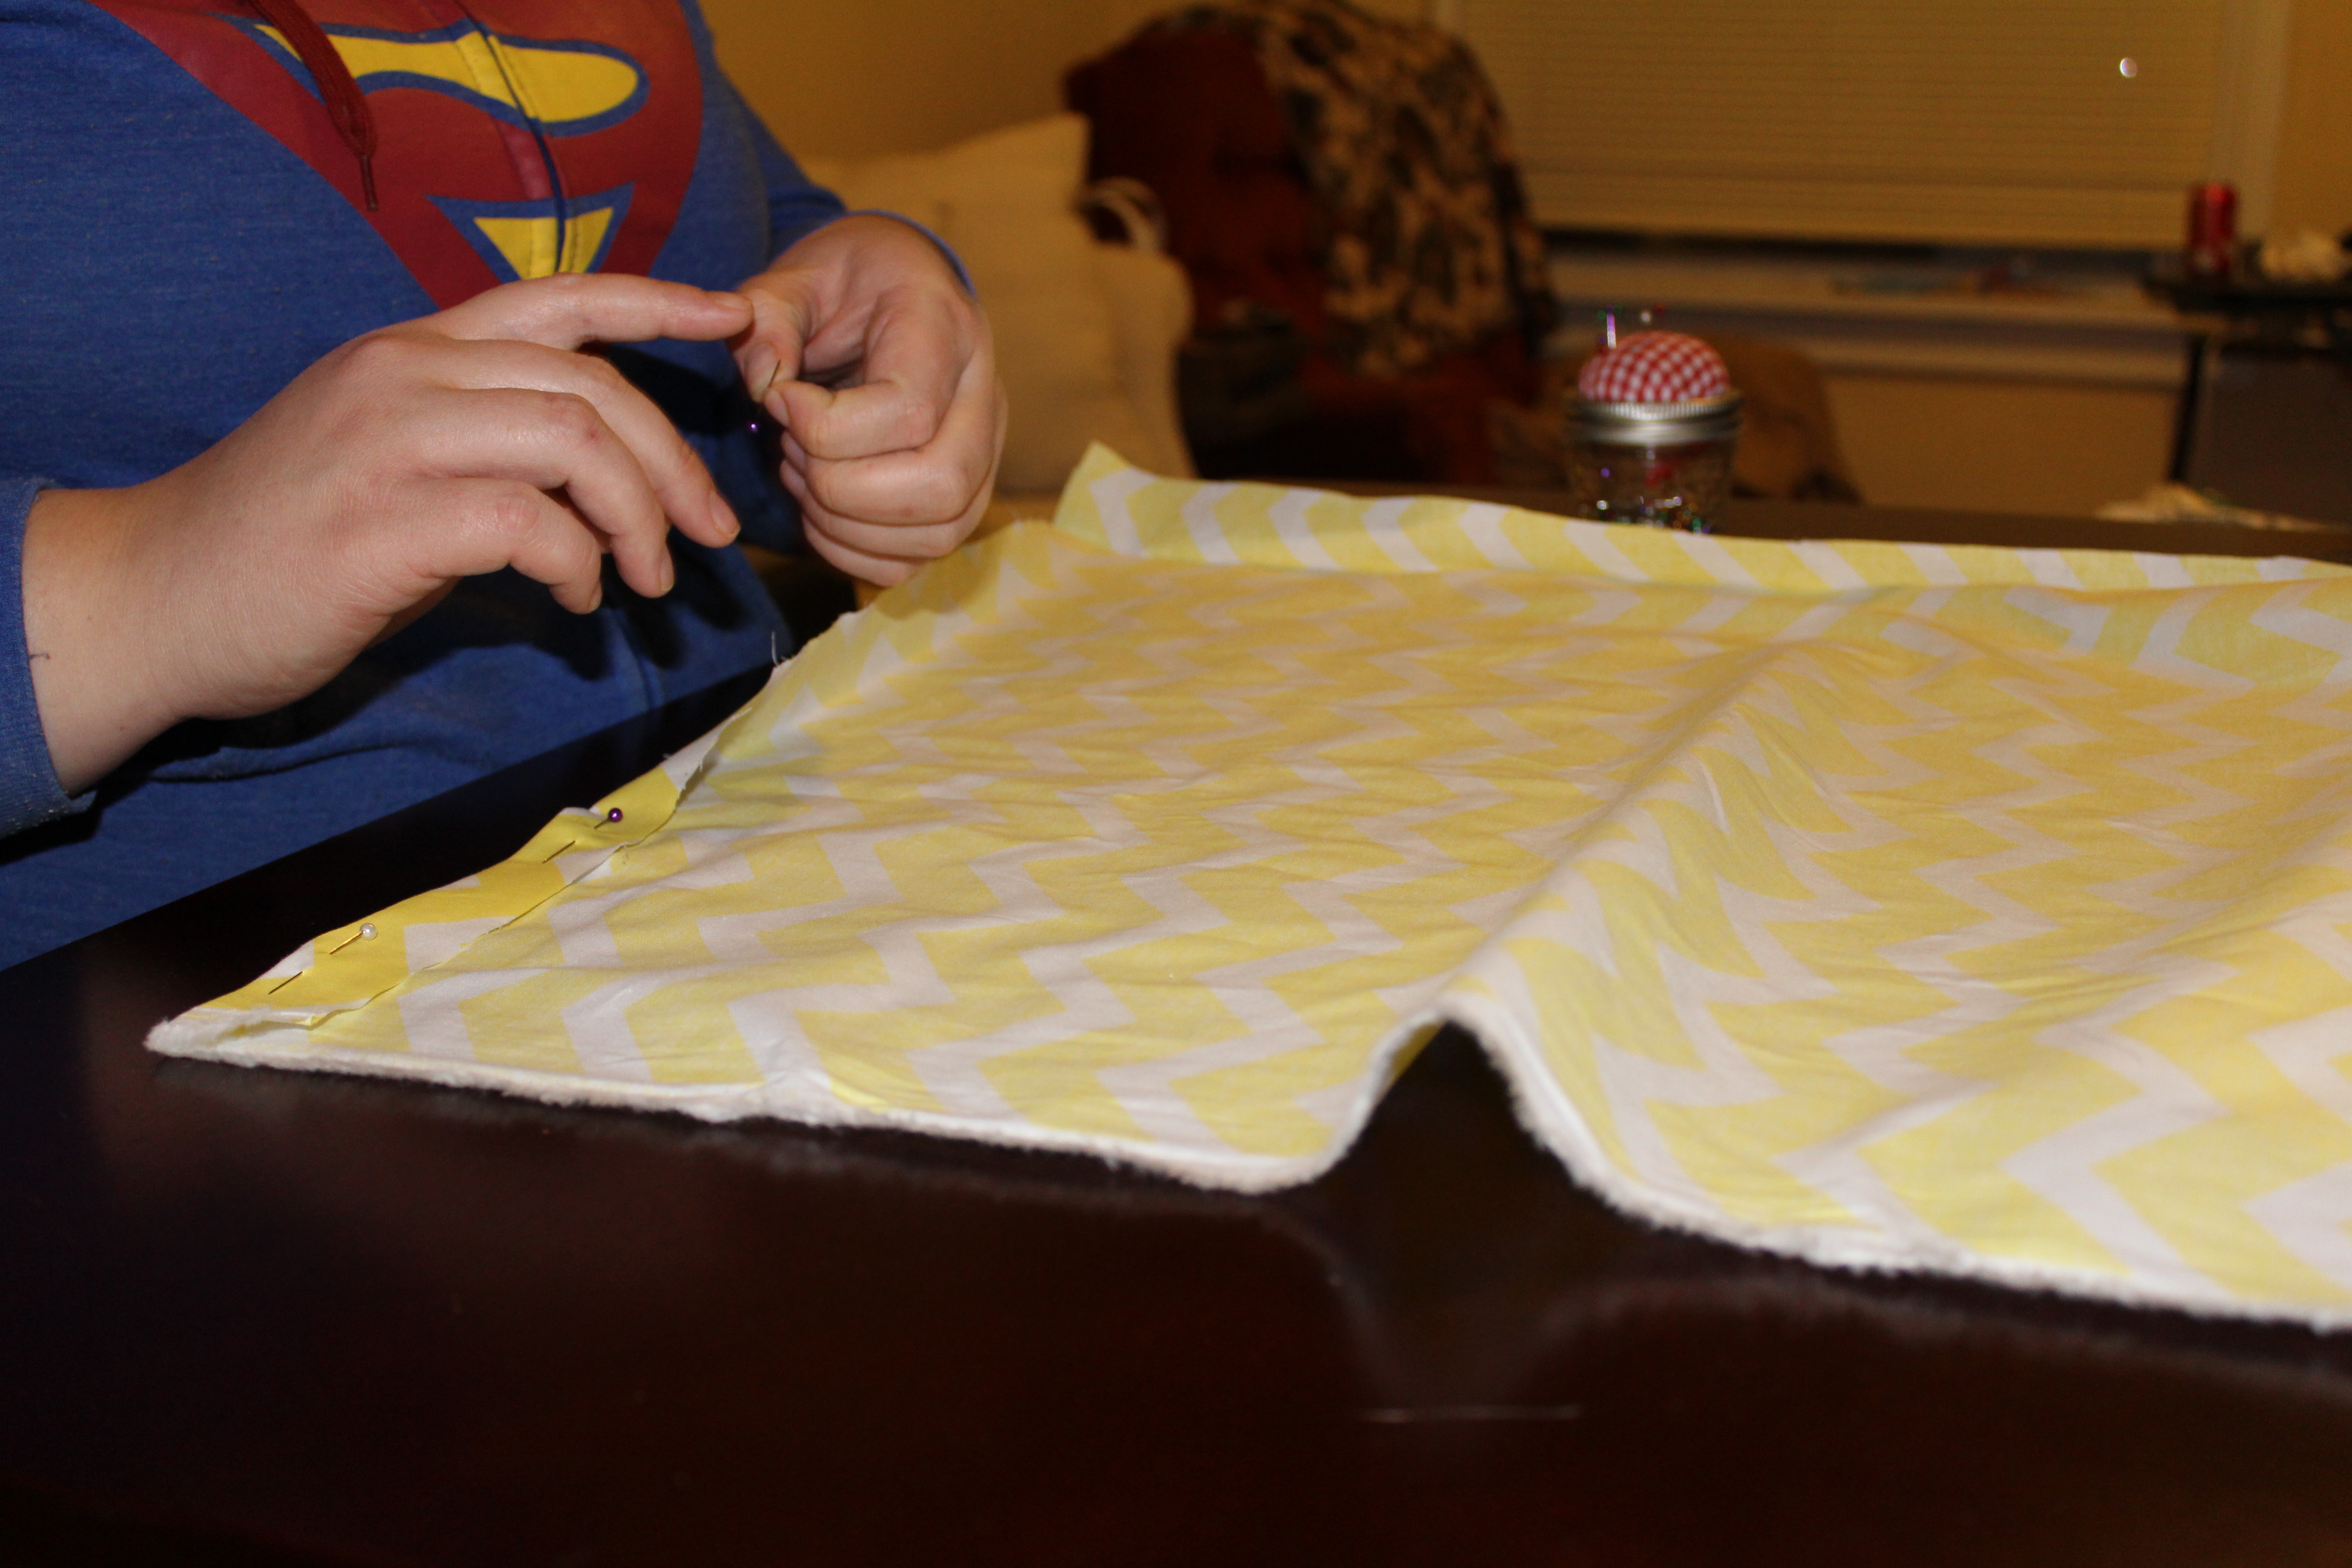
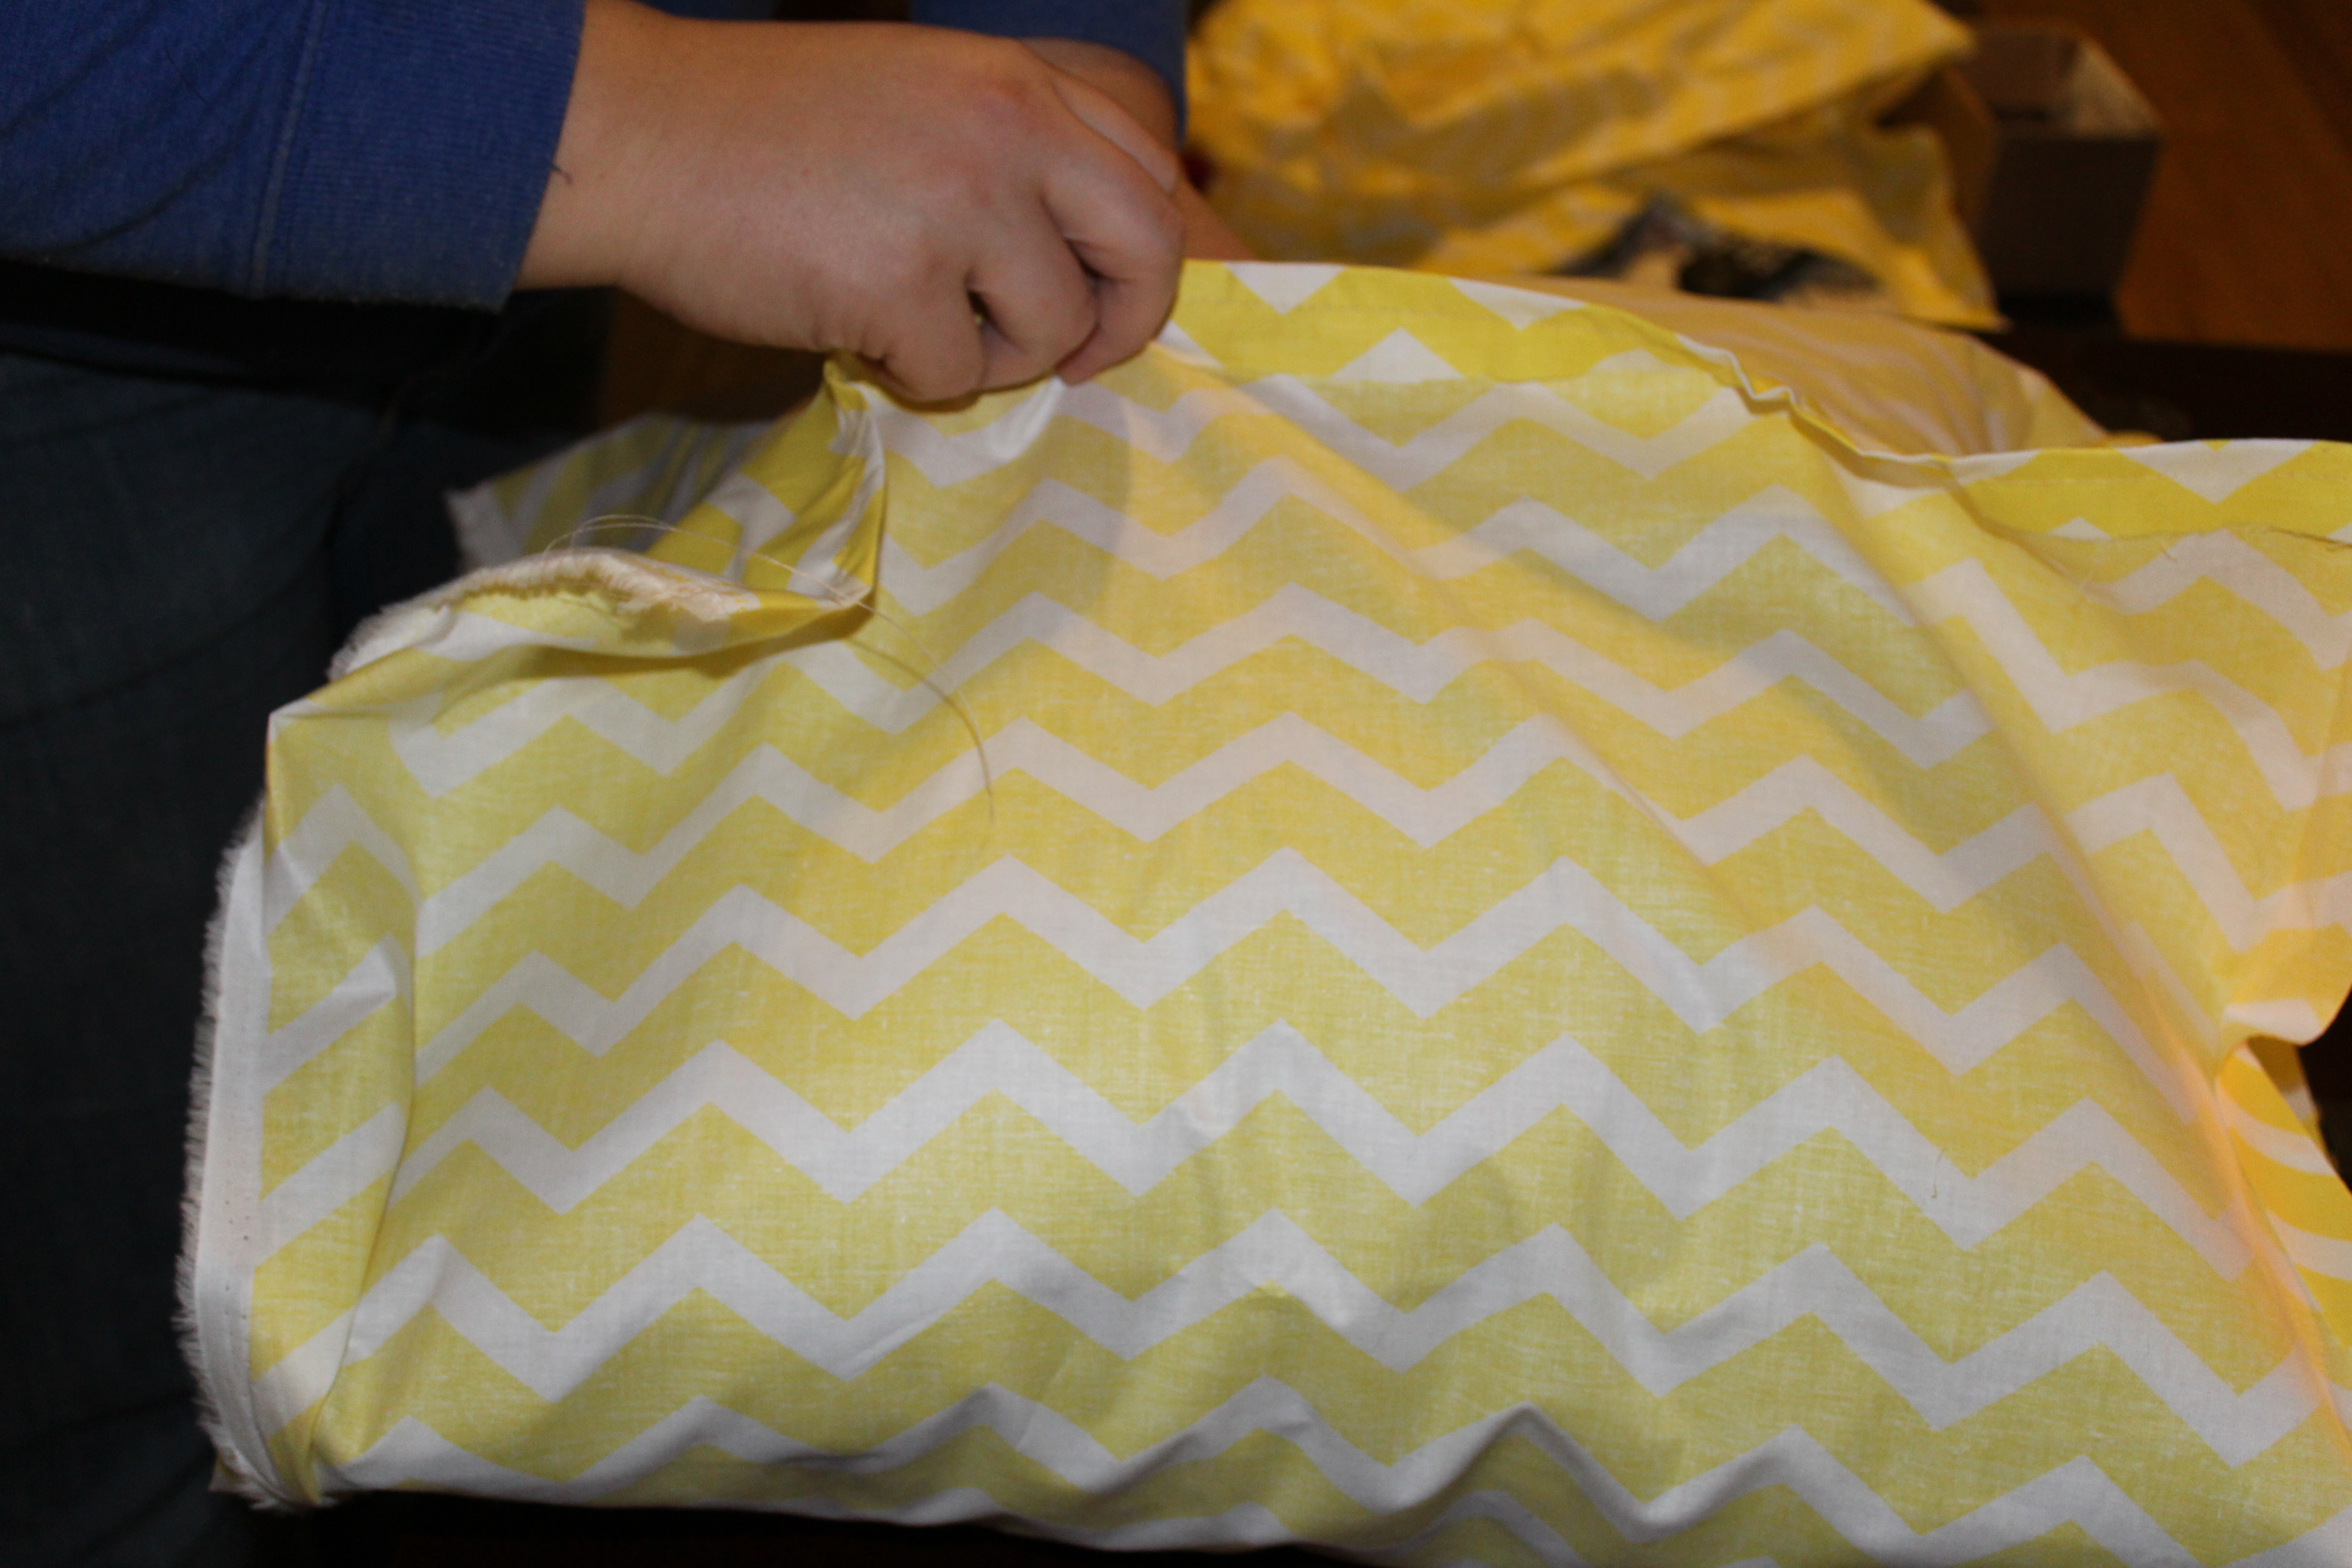
After both ends are hemmed, you want to wrap it on the pillow, with the wrong side facing you. The top and bottom flaps should be overlapping each other and fit it to the pillow as snug as you can, without scrunching the pillow. Once you have it wrapped, pin one side where the flaps are and then remove the pillow. Pin both sides of the cover, about an inch seam and sew the cover shut. Reminder, there should be an opening, only where the flaps overlap. Once sewn, you want to turn the fabric right side out and slide your pillow in the cover!
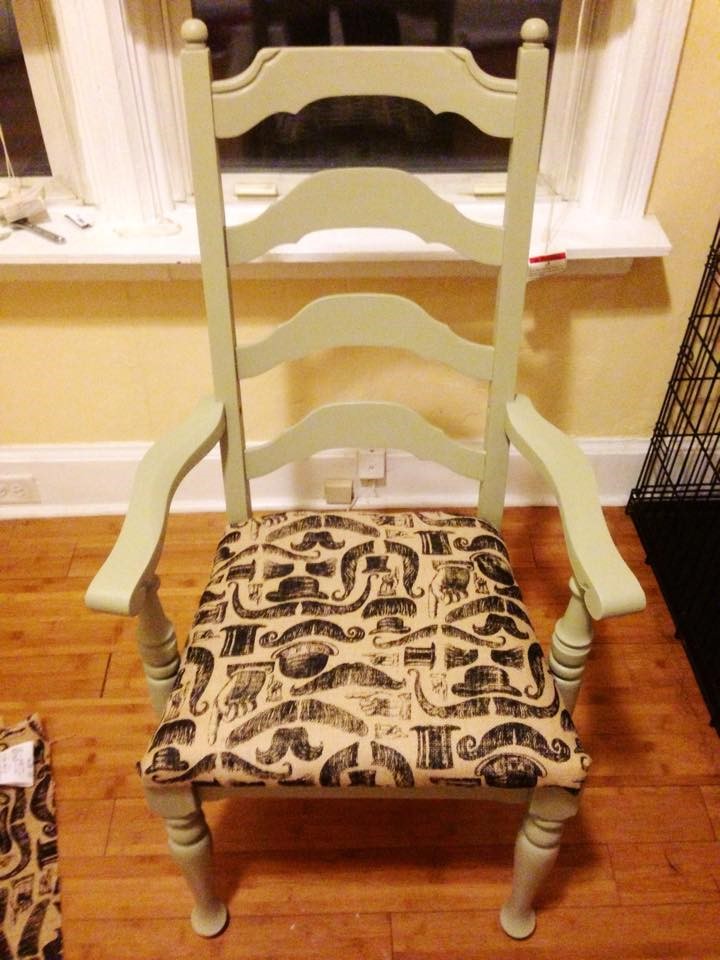
So that’s it as far as a basic pillow cover. You can stop there if you want. I’m obsessed with chevrons so I had to have them for my pillows. And I wanted to incorporate a chair that I had previously done last year that inspired the mustache burlap pillow.
If you go to the fabric store, there are so many options to choose from so if you find one that you absolutely have to have then that’s all you need! But that’s never all for me…
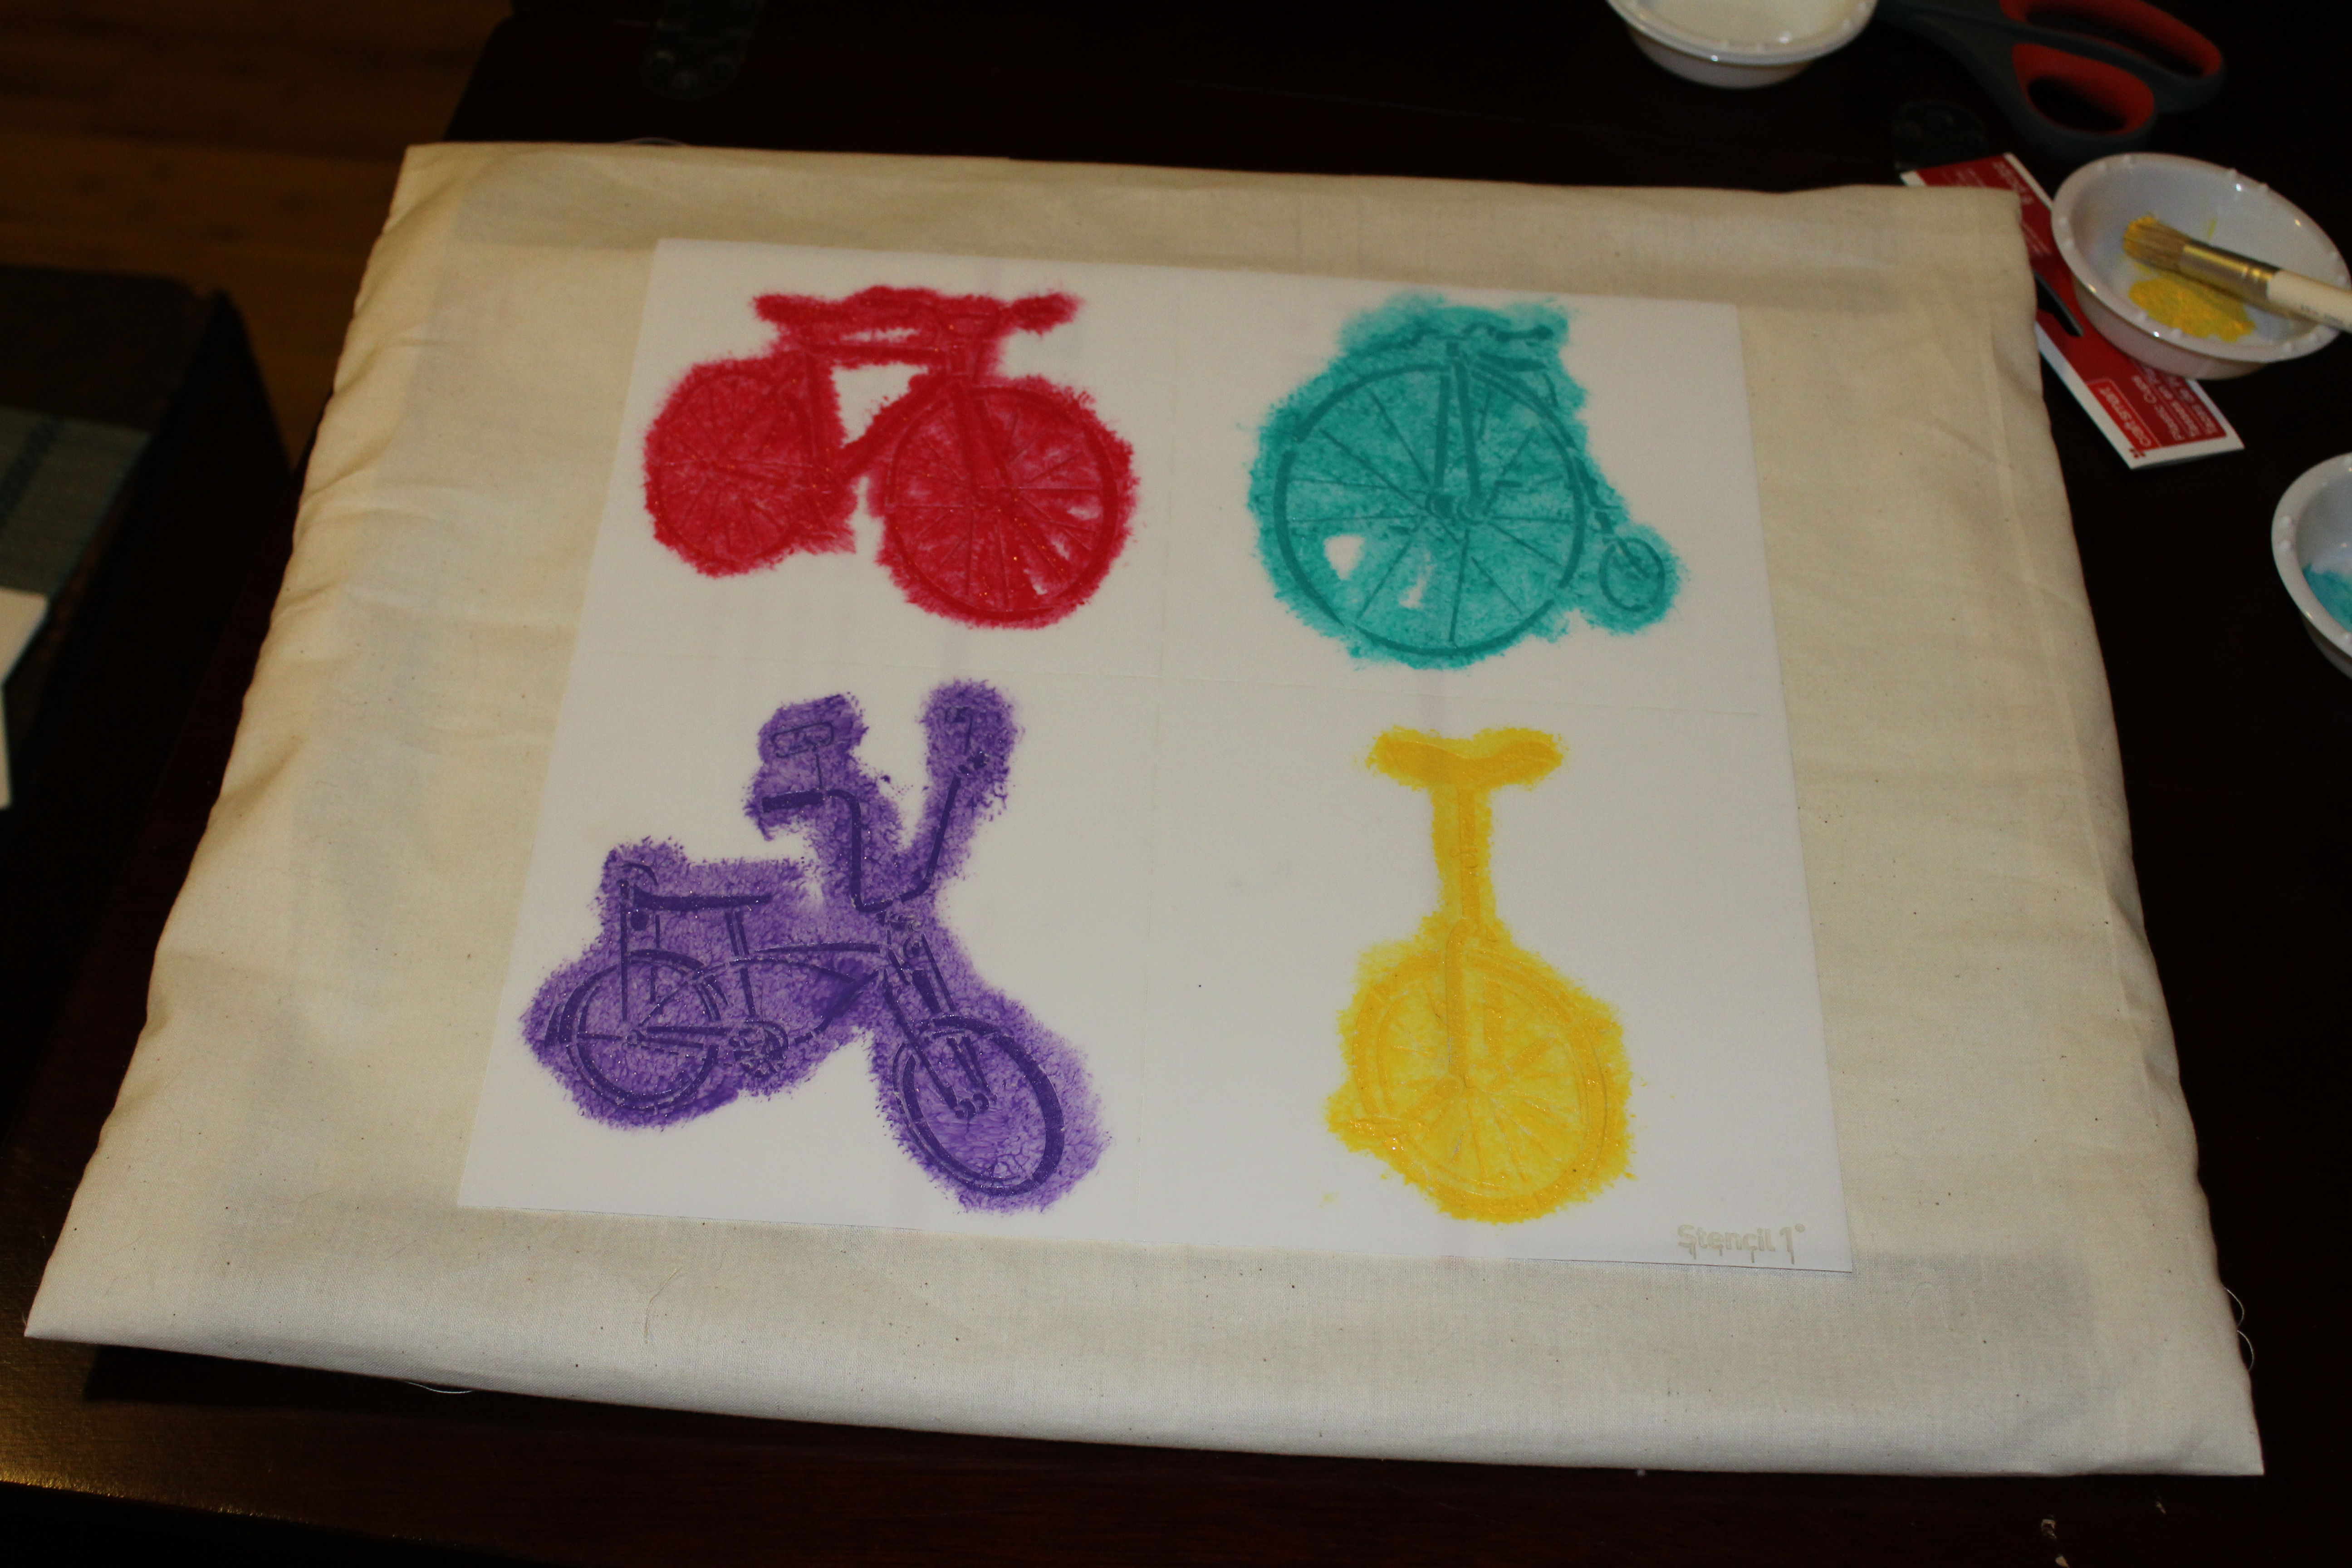
I wanted a pillow design that would kind of tie in with the mustache fabric. So I found this perfect stencil at Michael’s that had vintage and old school bicycles. Here are the tool’s you would need for a stencil image for your pillow cover:
- Stencil
- Fabric paint
- Stencil brush or Sponge brush
I’ve previously stenciled before, and it was a mess. I had no clean lines and it was frustrating. So I went ahead and purchased a Martha Stewart stencil brush kit that was about $8. You can totally use a sponge brush instead, which is much cheaper. It just didn’t work out for me the last time I stenciled. Place a piece of cardboard inside the pillow case. The colors I used were from Scribbles brand: Deep Turquoise, Purple, Christmas Red, and Bright Yellow. Just dab the brush in the paint and then tap it on the stencil. You literally have to be careful to not do any brush strokes and only tap the brush.
After you’re done, just let it dry!
Lastly, my wife and her coworkers have an obsession with Iggy Azalea’s “I’m so fancy”. So Lydia just loves that phrase. So I decided to make her the pillow cover!
So to make your own customizable stencil:
- Freezer paper
- Fabric paint
- Stencil brush or Sponge brush
- Iron
- X-Acto knife
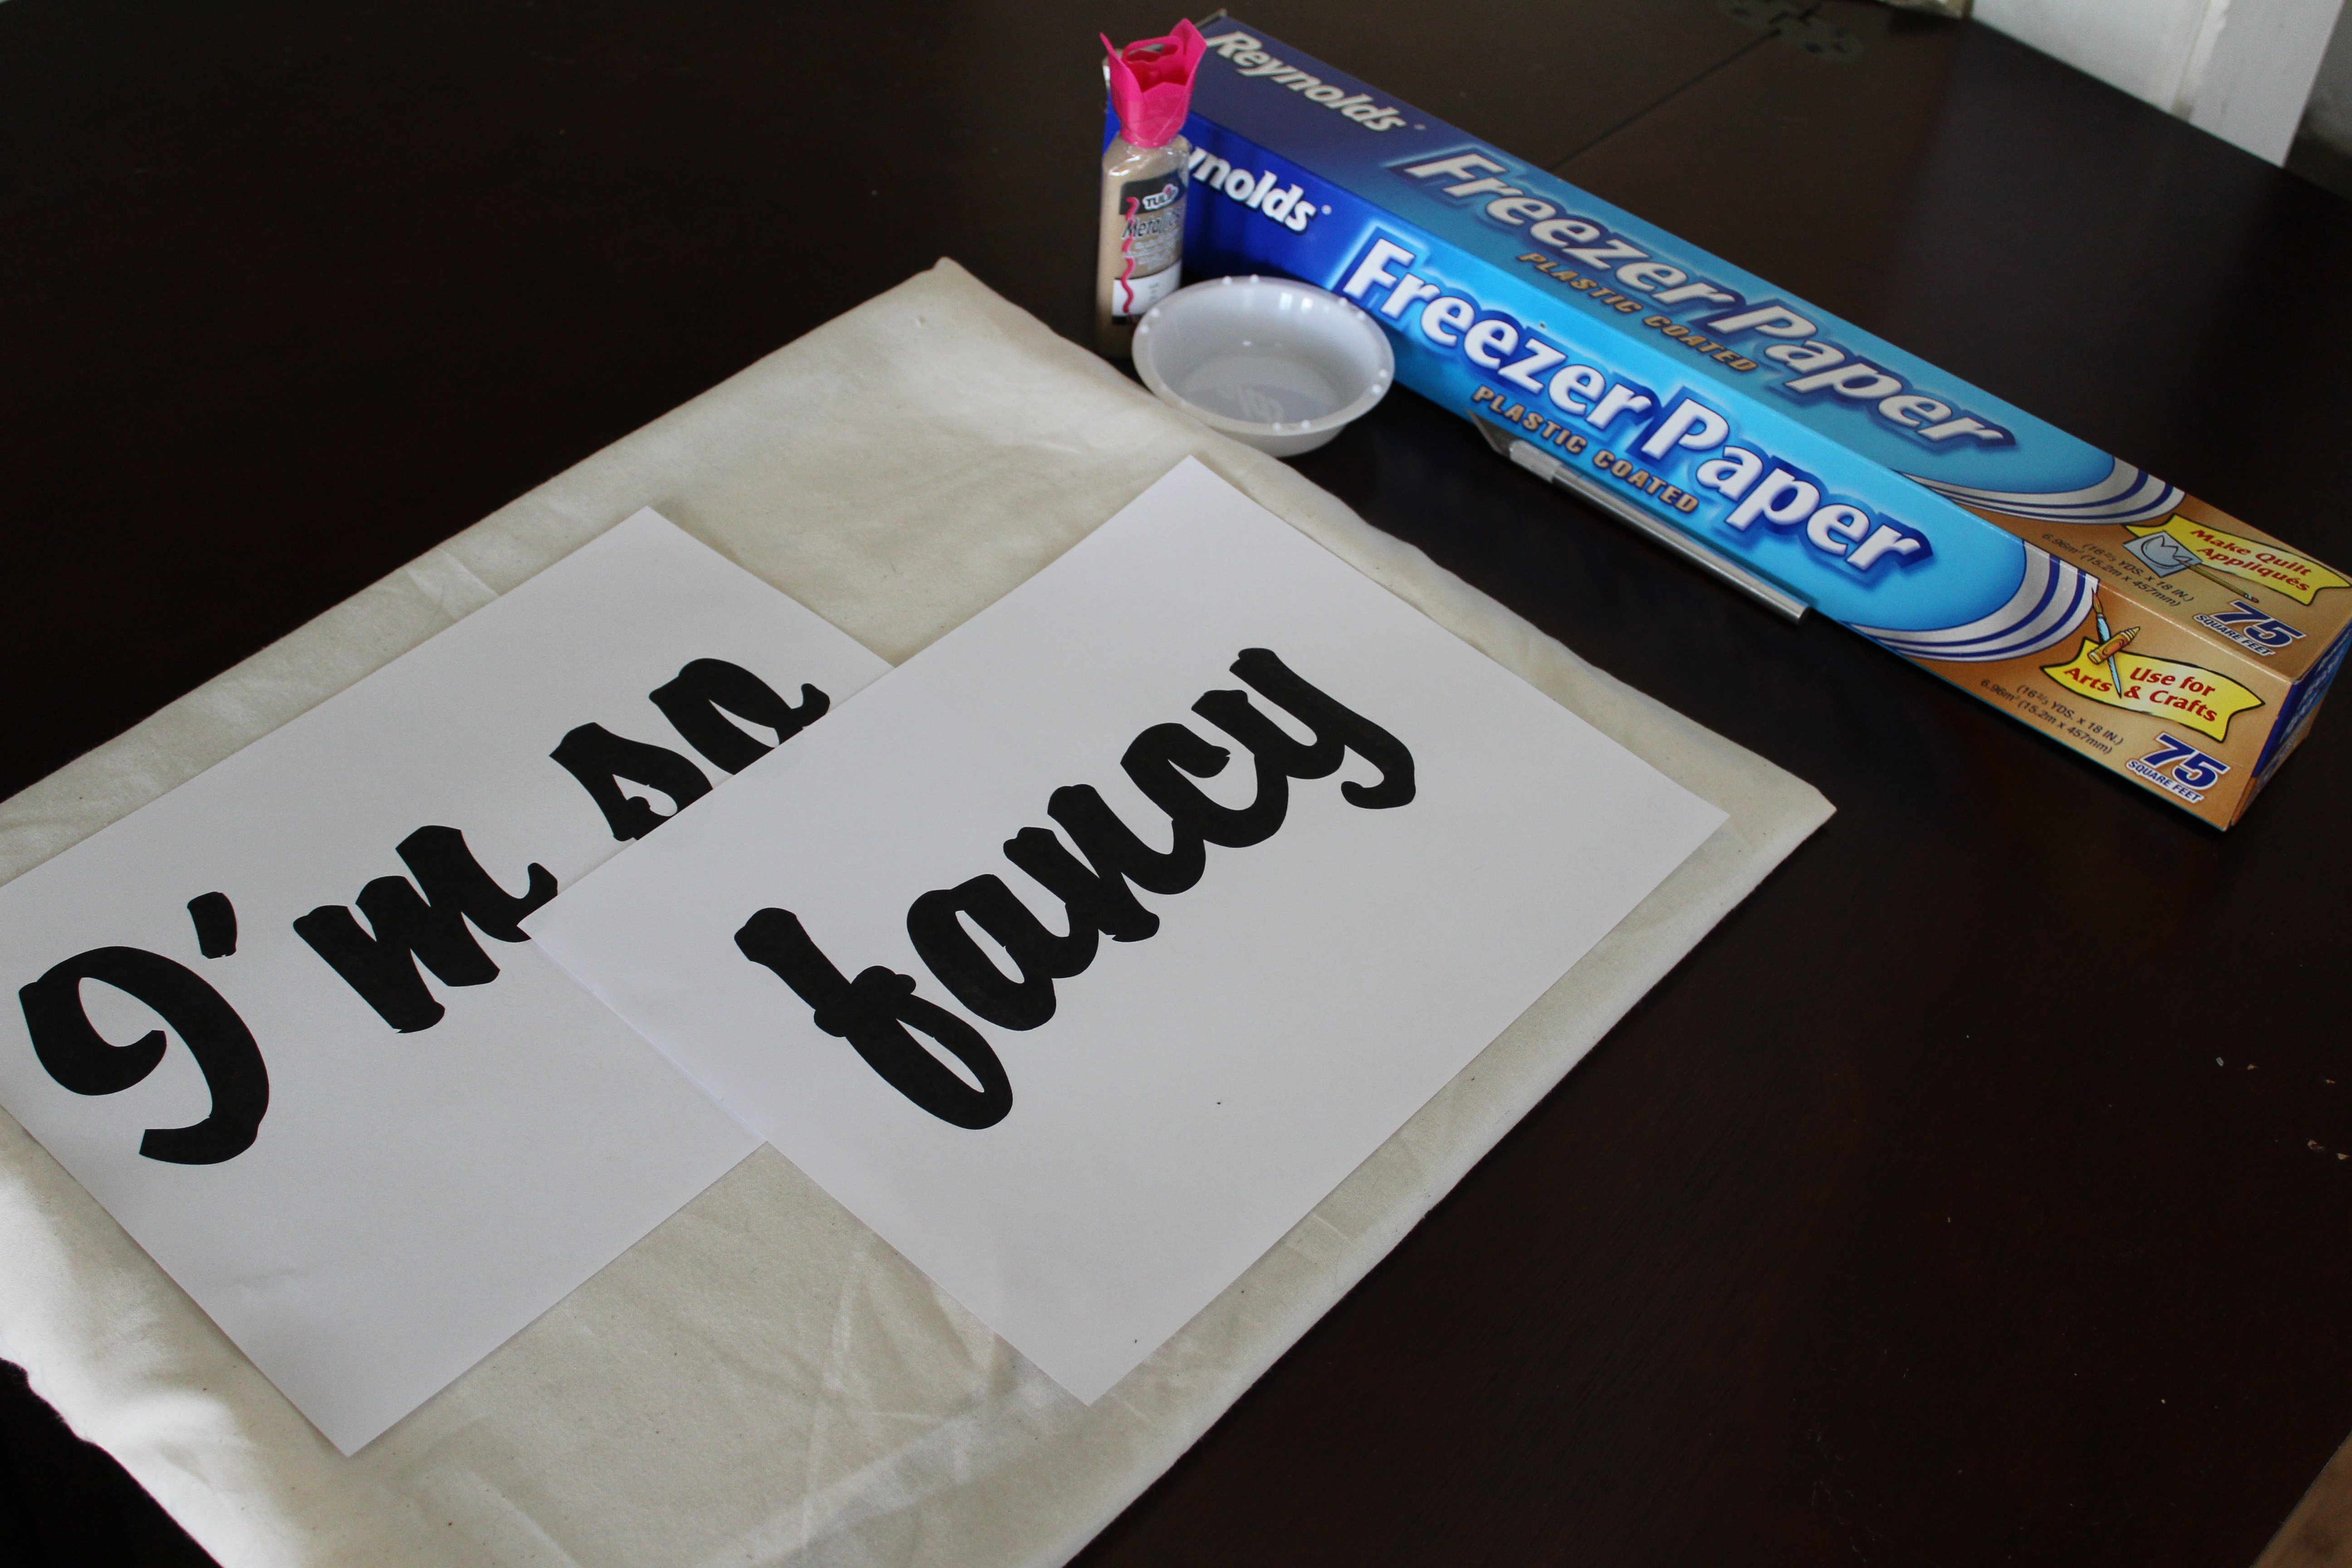
So I just went on my computer and found a font that I liked and print out “I’m so fancy”. You can use my template if you want by clicking here.
Once you have the template, you want to take a piece of freezer paper out. The freezer paper has a shiny side and a matte side. We want the shiny side to face down, as it will stick to the fabric when ironing it. Line up the two papers and tape the template to the freezer paper and trace the image with your X-Acto knife. After you have the template cut out., make sure with words, you keep the insides of the letters, like mine has the “s”, “o”, “f”, and “a”.
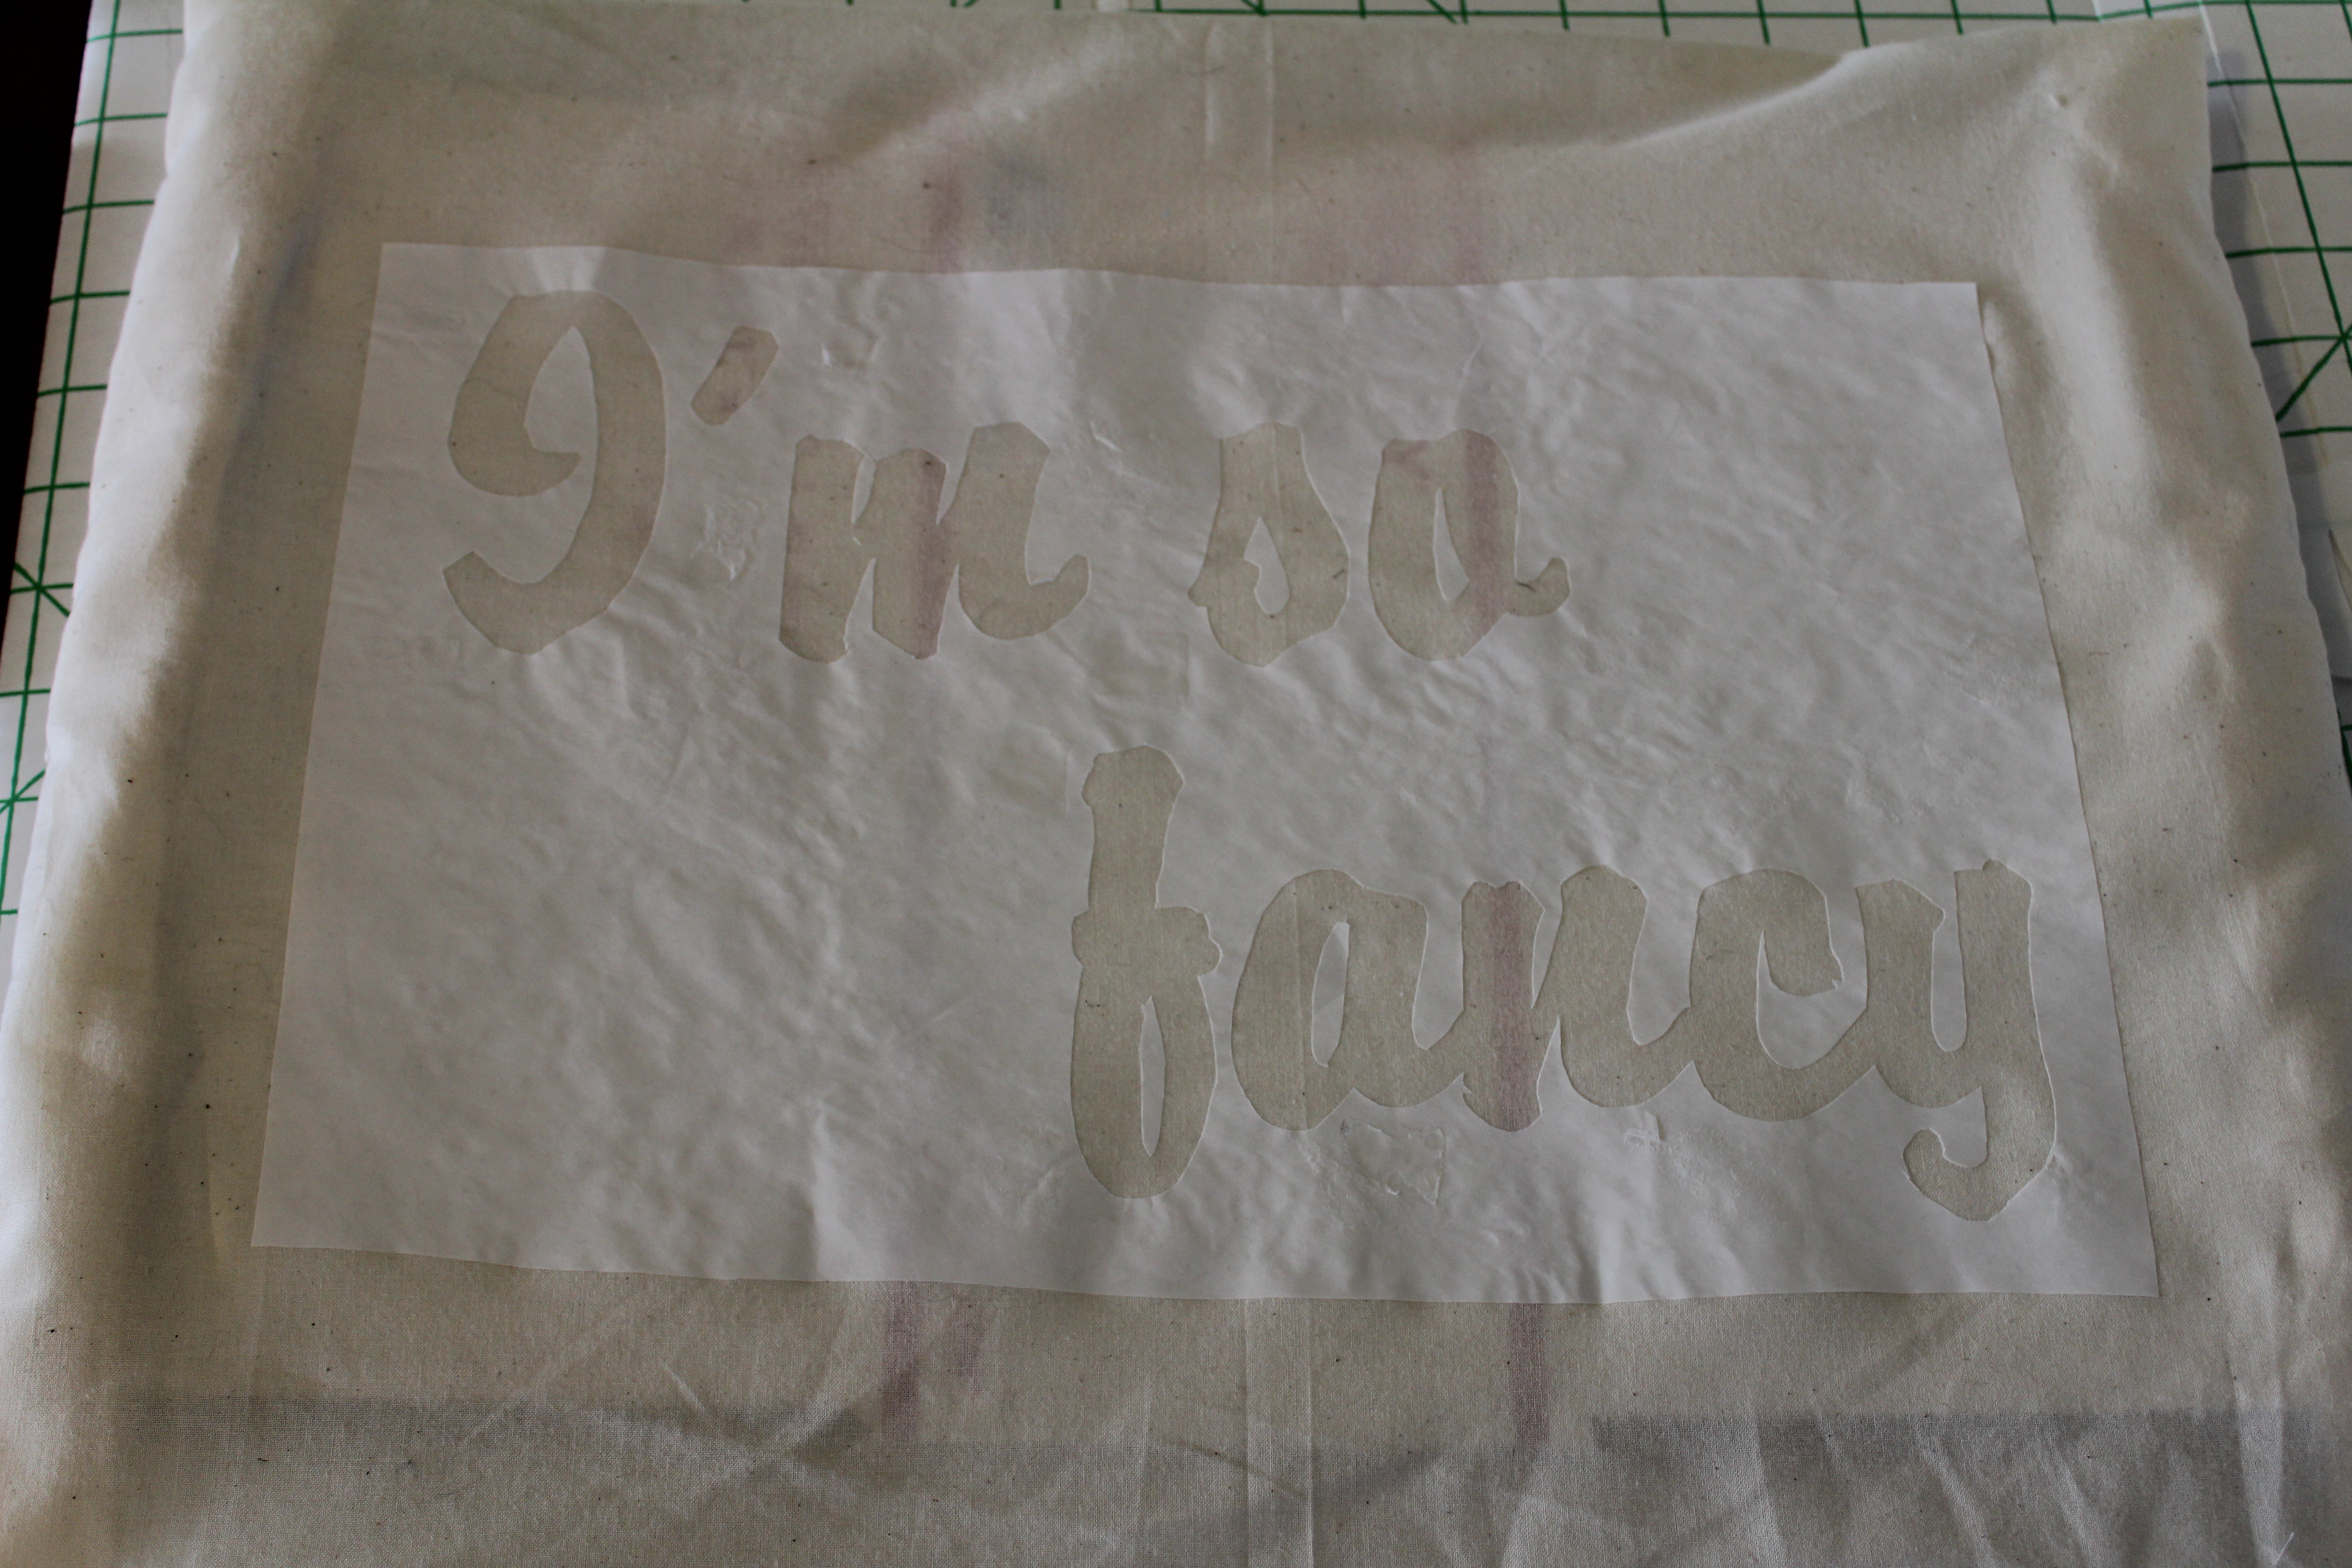
Place your freezer paper on the fabric the way you want it to lay out and then iron the paper to the fabric. I would recommend turning off the steam feature of the iron and don’t slide the iron on the paper. Just press it in place for about 20-30 seconds before moving to the next section. After ironed on, you will take your paint and brush, and just like before tap it along the stencil. For this pillow I used Tulip brand Gold Metallic paint color.
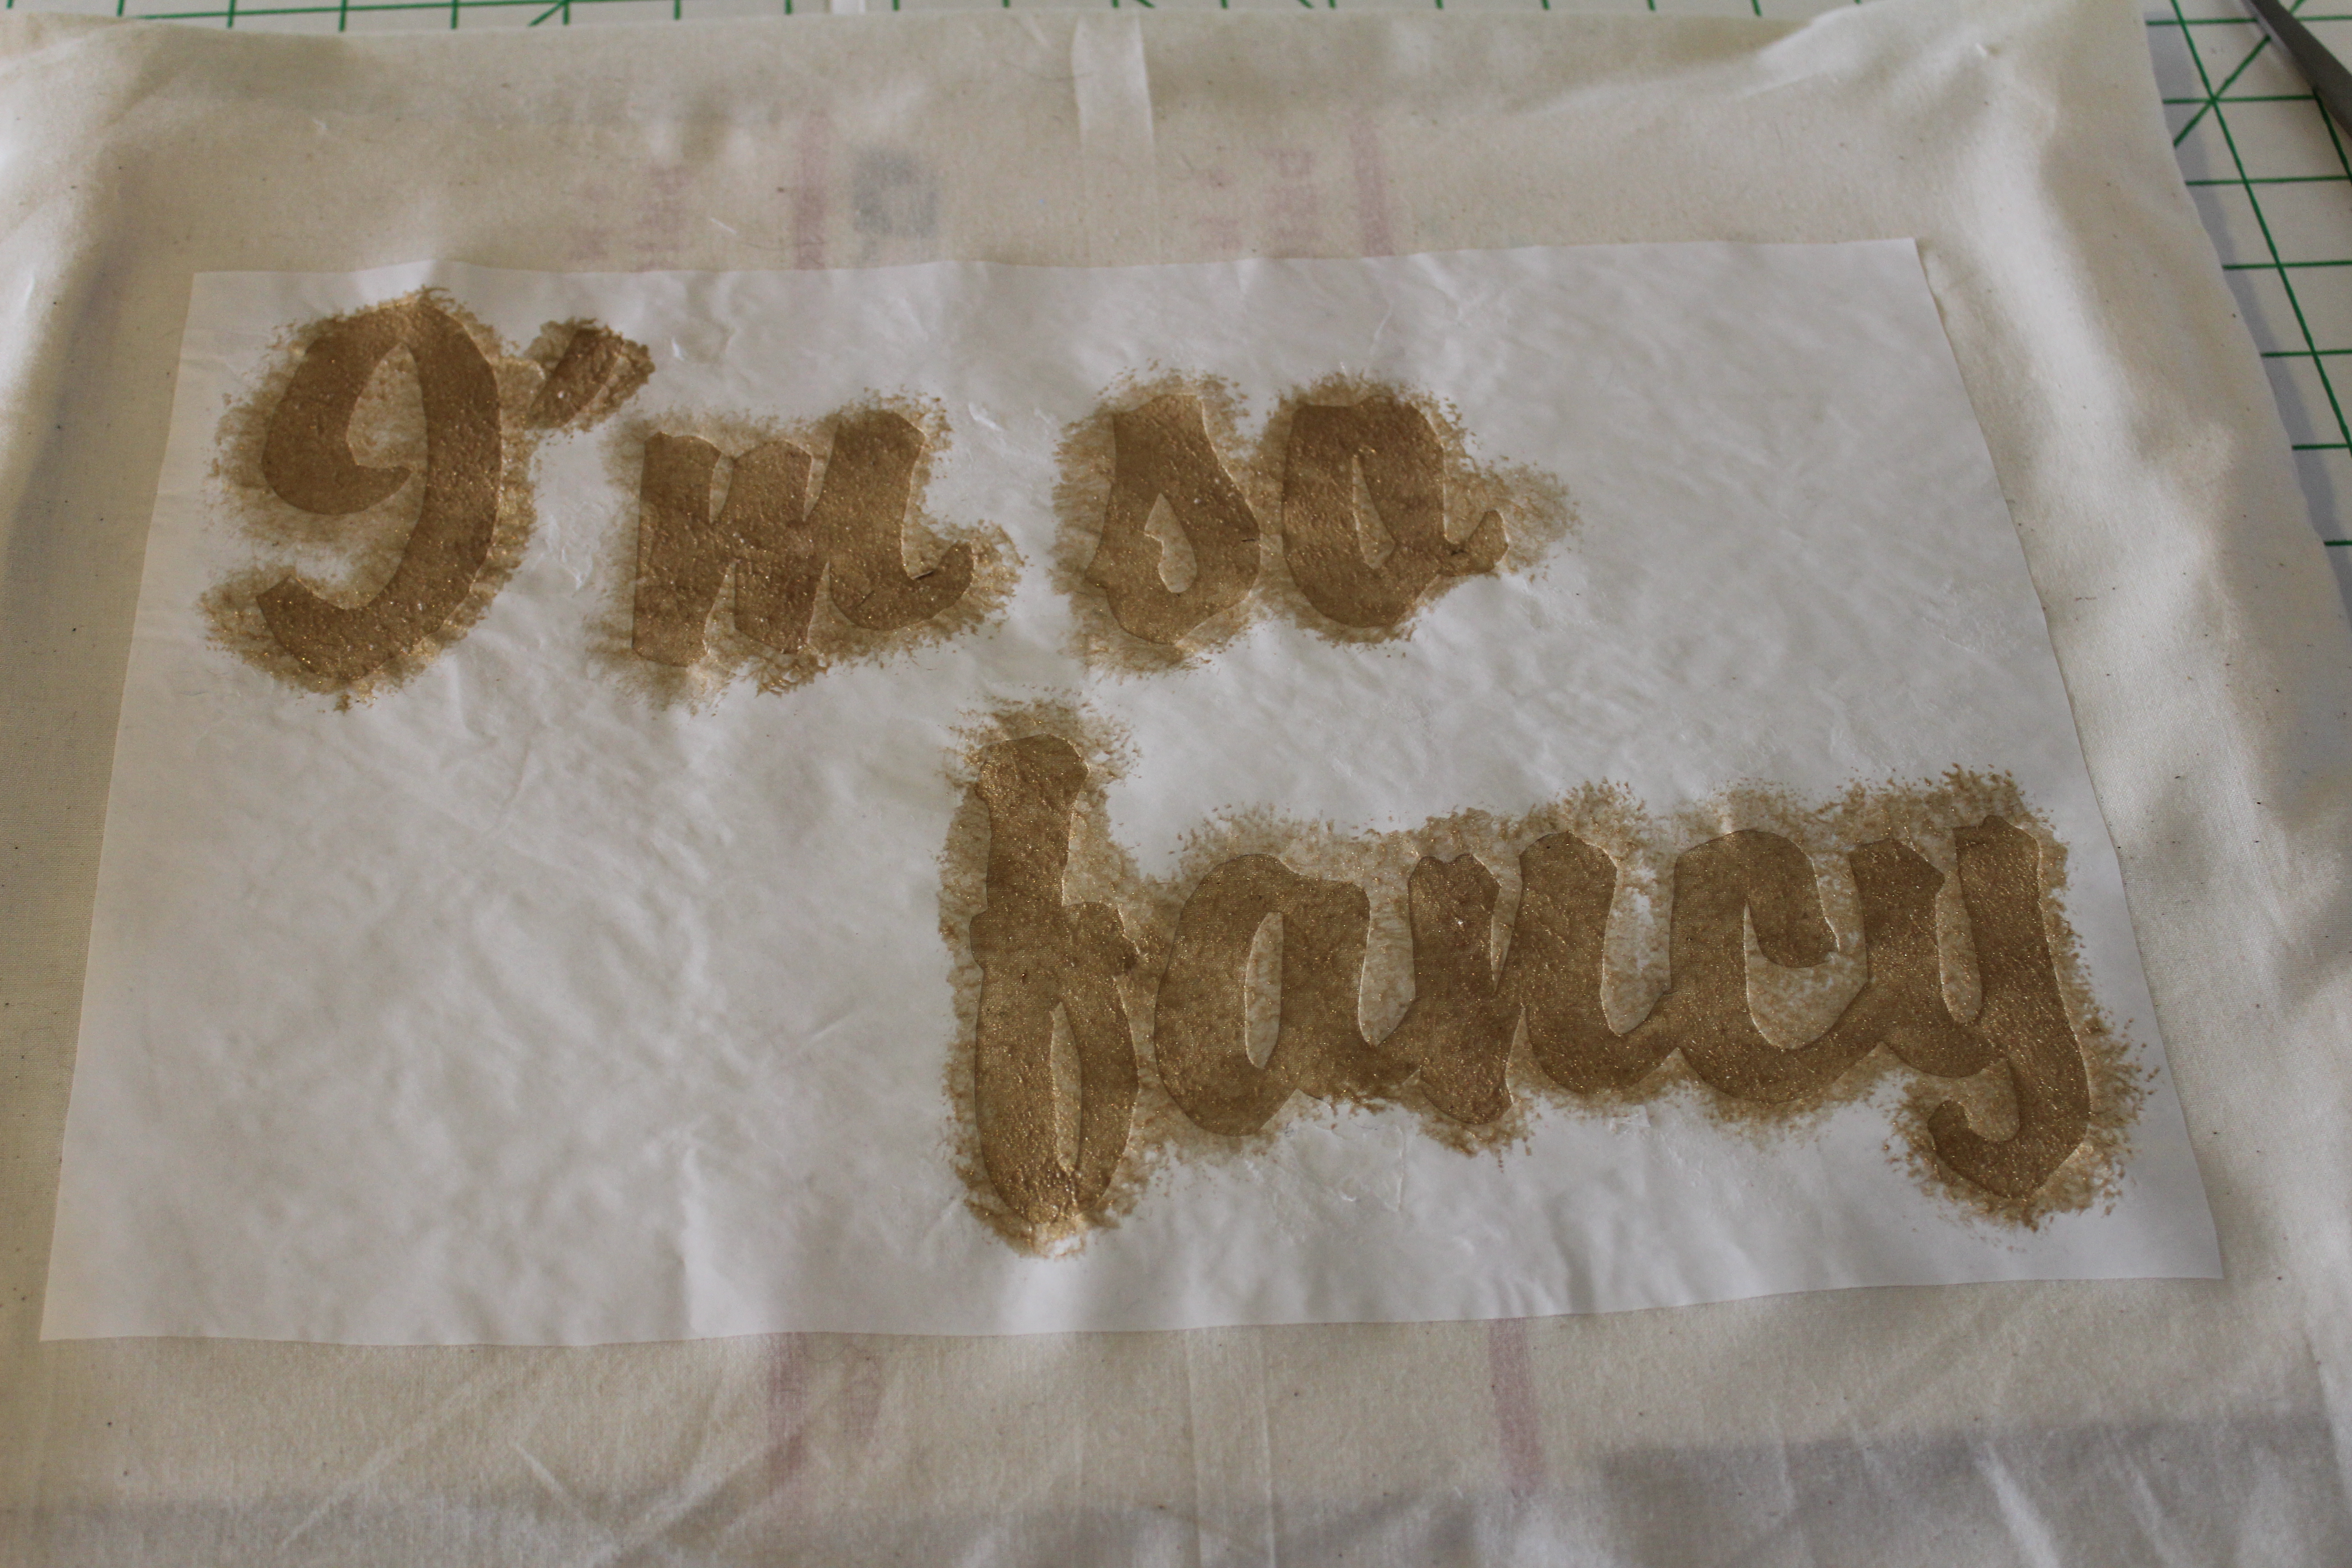
After you have your paint on, carefully remove the paper off the fabric and let it dry.
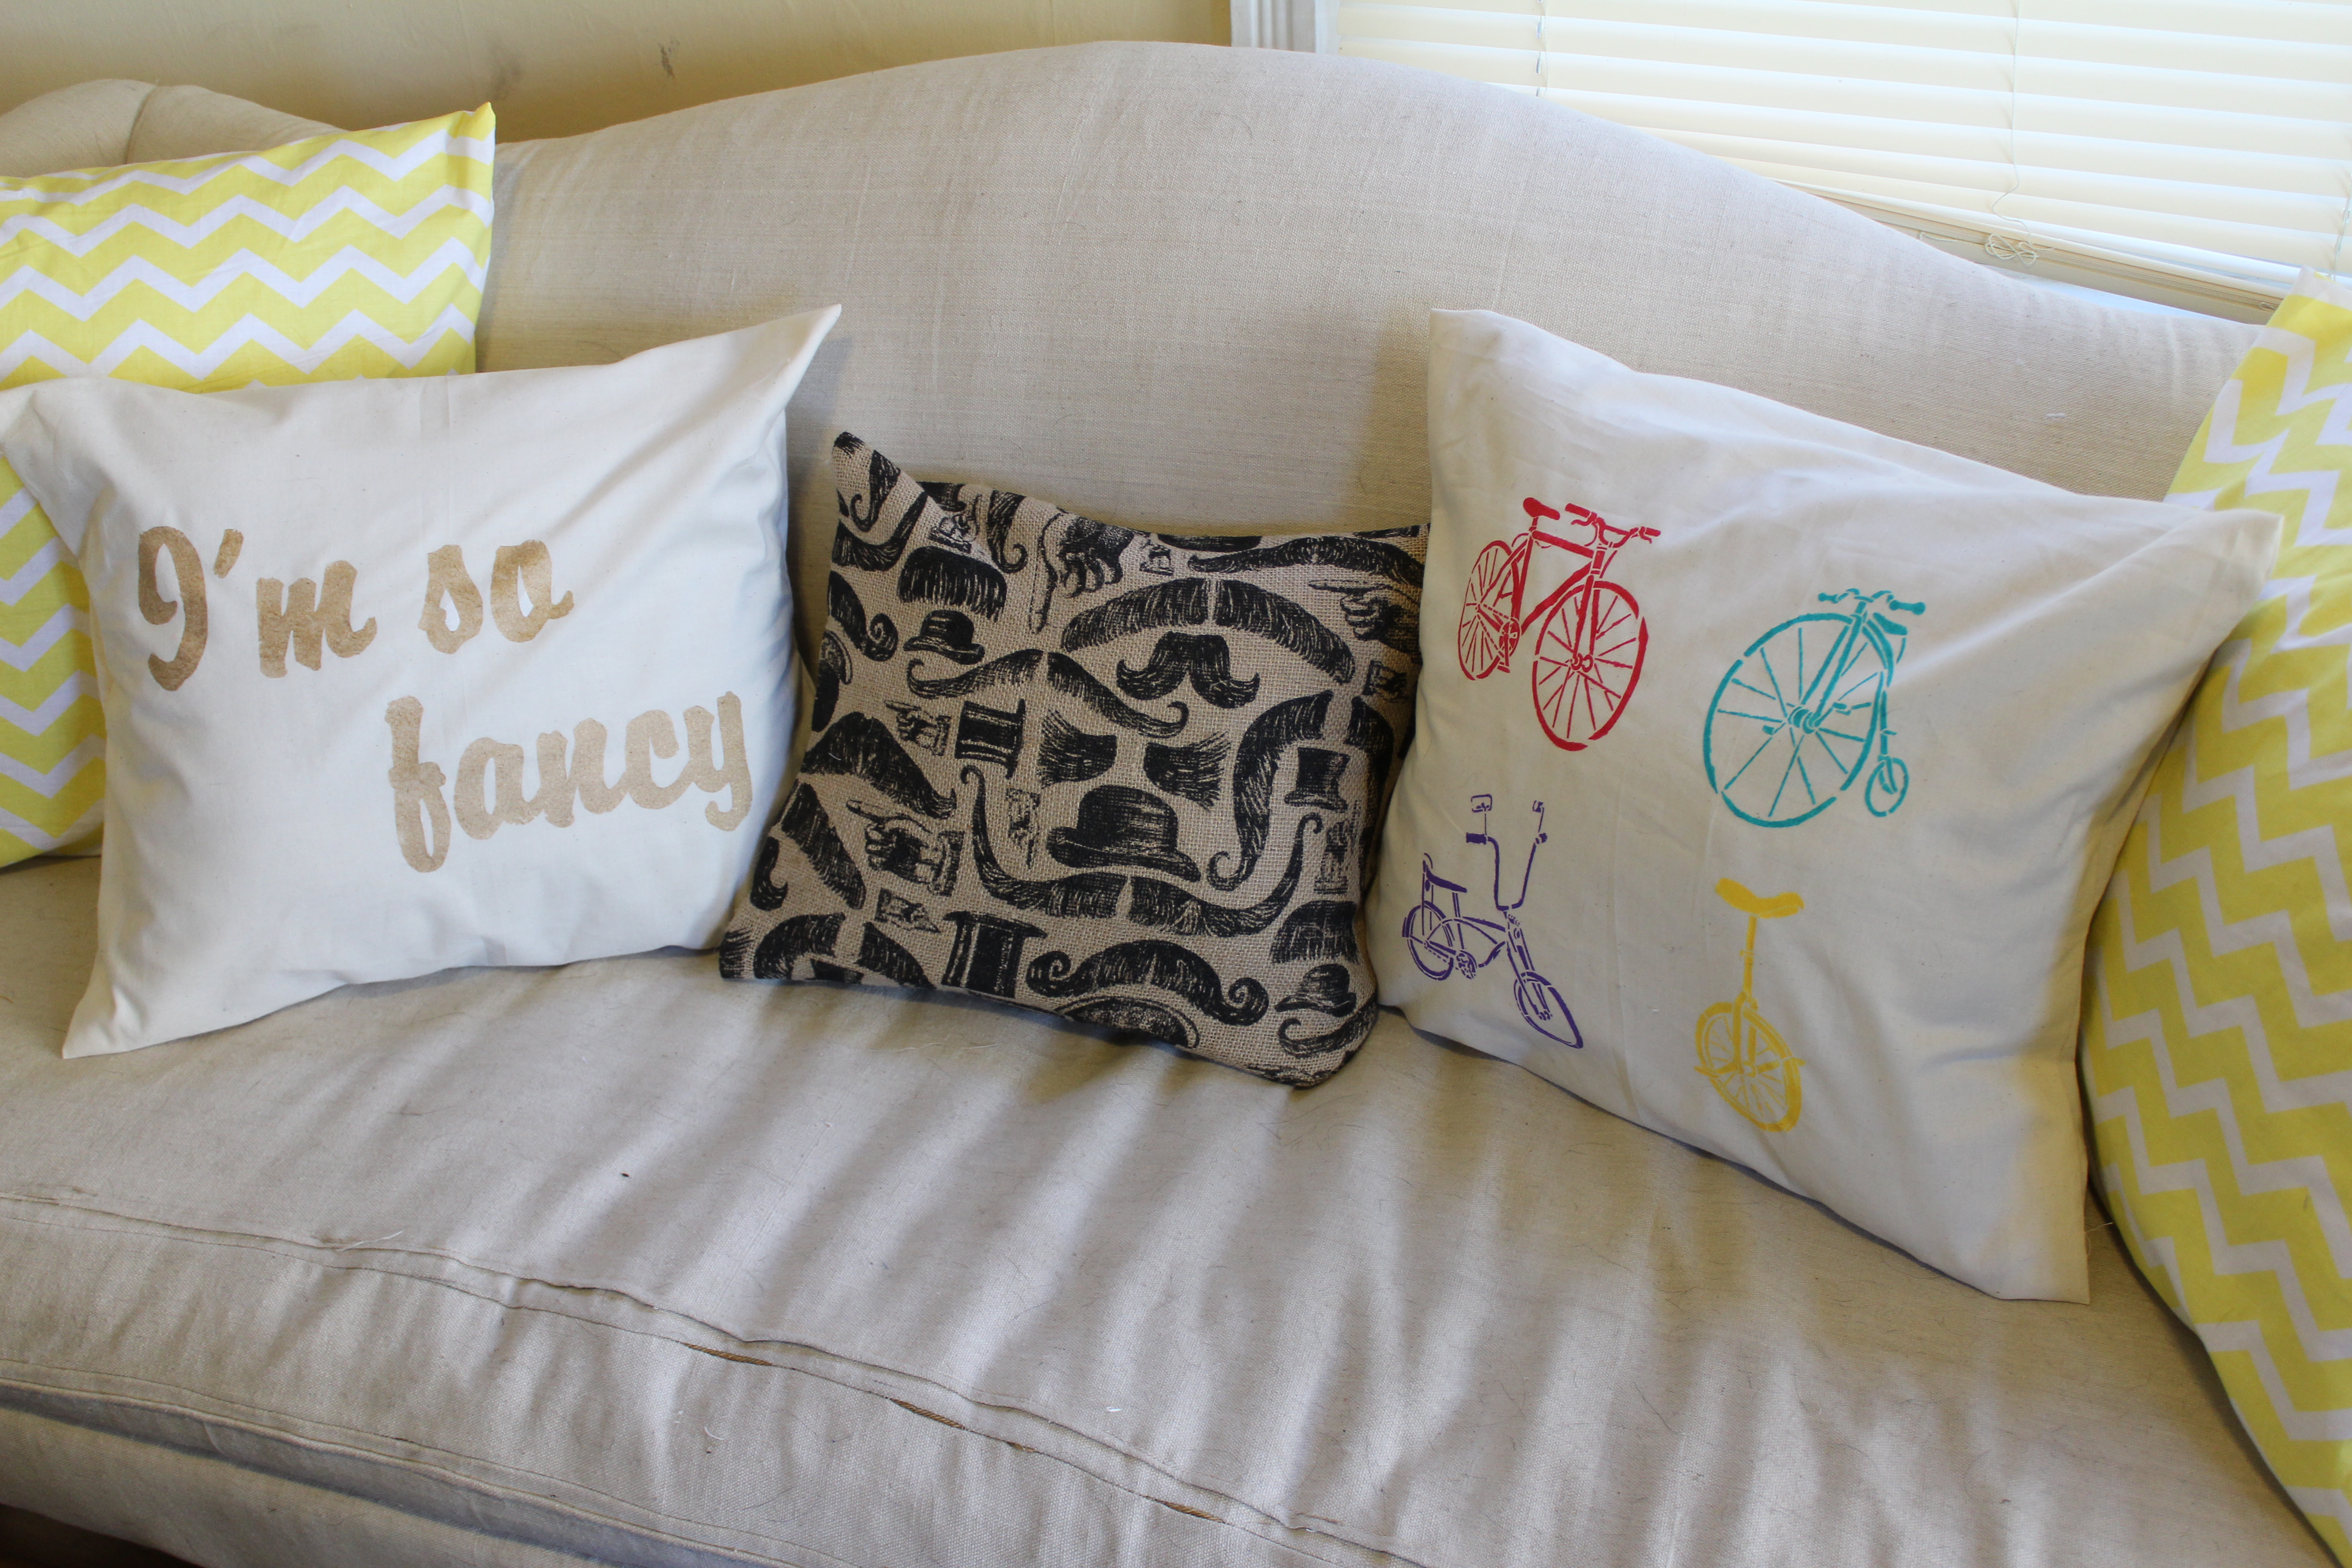
And there you have it! You have new pillows that are super cute and the best part, you can make as many as you want. I love how simple this was. If I want a different look next week, I can change it easily!
I hope you enjoyed this project, from making the pillows and then accessorizing them with cuteness. Thankfully, my living room is becoming cuter and cuter and its almost done aside for a few more pieces that need to be DIYed but I’m always up for the challenge! Next week we are going to be making marques….YAY! So come back and check it out. Remember to check out my store on the Buy my Crafts section link and let me know what you think of this DIY project by commenting. If you made your own, share your pics. I would love to see it! Want to see something made? Let me know in the comments!
As always follow me on Facebook (Crafting over Coffee) and Instagram (@craftingovercoffee) for updates on sales, projects, and crafting shenanigans
See you next week!
